The Sewing Mark option allows you to add accurate marks to your job for folding or hemming after the job is printed. Sewing marks are commonly used with Tiling.
You can access the sewing mark option through Job Editor in the Process/Print Setup dialog, or through RIP-Queue in the Advanced Quick Set Options.
To use the Sewing Mark option:
In Job Editor:
- Open the Sewing Mark option by clicking the Print Setup icon on the toolbar or File > Print Setup... > Sewing Mark.
- Check the box to enable Sewing Marks.
In RIP-Queue:
- Open the Advanced Quick Set Options by clicking Edit Quick Sets > Edit > Advanced > Sewing Mark tab.
- Check the box to enable Sewing Marks.
You can select any of the following Sewing Mark options:
 Sewing Marks
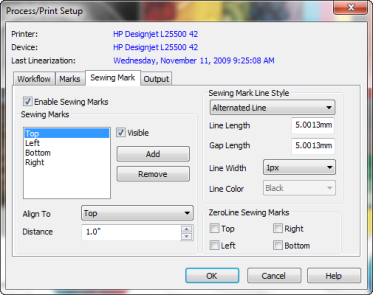
Figure 1